Showing posts with label crafts. Show all posts

Friday, 16 May 2014

Painting with Foodscraps - Dipingere con le Verdure


Don't throw away your food scraps! Look at what wonderful flower stamps they can make! Here you can see an apple core and three types of lettuce. We used watercolours and a plastic plate and you can see how delighted Sera was to paint in this way!

I''m thinking of trying the technique on a stained tablecloth I've been hoping to upcycle. Stay tuned!


Non buttare via i resti tagliate delle verdure! Guardate questi meravigliosi timbrini aforma di fiore che diventanno con un po di fantasia. Qui potete vedere il centro della mela e tre tipi di lattuga. Abbiamo usato acquerelli e un piatto di plastica per la pittura.  Vedi come felice Sera sperimentando la nuova tecnica?

Penso di riportare la tecnica anhe su una tovaglia macchiata. Restate sintonizzati!


 Jess

---
Liking buonaserababy?  I'd love to hear from you! Now you can follow in so many ways!

Wednesday, 7 May 2014

DIY Necklace Organizer - Organizzatore le Collane Fai-Da-Te


I decided that this spring instead of updating my wardrobe I would update my accessories. This has meant some recent purchases of necklaces and no where to store them so I decided to create my own necklace organization display.

Here's how I did it:

1) find an antique hanger
2) nail some smal nails into the pants bar.

Easy-peasy and super cute!

Need more jewelery organisation DIYs? Check out my earring organizer here! It's one of my all-time most popular posts!

P.S. the hanger doesn't HAVE-TO have your last name written on it. In my case that's just a happy coincidence!

-

Ho deciso che questa primavera invece di aggiornare il mio guardaroba vorrei aggiornare i miei accessori. Così ho acquistato di recente delle collane e nonsapevo dove metterli. Ho deciso di creare la mia organizzatore di collane. 

Ecco come ho fatto: 

1) trova un appendiabiti antico 
2) inchiodare alcuni chiodi piccoli nella barra dei pantaloni. 

Troppo bella!

Hai bisognia di organizare anche i tuoi orrecchini? Leggi questo post. è uno dei migliori sul blog!


 Jess

---
Liking buonaserababy?  I'd love to hear from you! Now you can follow in so many ways!

Tuesday, 15 April 2014

Tie-Dyed Easter Eggs - Uova di Pasqua al Tie-Dye

Sera and I decided o share our Easter crafting project with you; Tie-Dyed easter eggs.

1) hard boil your eggs so that they are not so fragile and can be eaten later.
2) Put 2 layers of cling film and one paper towel in a plastic bowl
3)Drip food colouring onto the paper towels
4) spray the coloured paper towels with water until evenly wet and he colours have blended.
-
Voglio condividere il crafting di Pasqua che abbiamo fatto ieri; Uova di Pasqua tie-dyed. 

1) far cuocere le uova in modo che essi non sono così fragili e possono essere mangiati più tardi. 
2) mettere due strati di pellicola trasparente e un tovagliolo di carta in una ciotola di plastica 
3) coprire la carta con qualche gocciola di colorante alimentare
4) spruzzare i tovaglioli di carta colorati con acqua fino uniformemente bagnato e lui colori sono mescolati.


5)Carefully wrap rubber bands around your eggs and place them in the bowl
6) take the sheets of cling film and paper and wrap them tightly around the egg, being careful not to stain your hands
7)wrap more elastic bands around the package
8) Let the egg sit in the package for 2-3 hours
9)Unwrap the egg, rinse and enjoy your beautiful new colours!

-
5) avvolgere con attenzione qualche elastici intorno le uova e metterli nella ciotola 
6) prendere i fogli di pellicola trasparente e carta e avvolgere strettamente intorno all'uovo, facendo attenzione a non macchiare le mani 
7) avvolgere più elastiche sul di tutto il pacchetto 
8) Lasciare l'uovonel pacchetto per 2-3 ore 
9) Svolgere l'uovo, sciacquare e godetevi i vostri bellissimi nuovi colori!


I'm  taking a few days away from the blog so I'm wishing you all a -
 Sto faccendo una pausa dal blog per un paio di gironi allora:
HAPPY EASTER AND PASSOVER - BUONA PASQUA E PESACH A TUTTI!


 Jess

---
Liking buonaserababy?  I'd love to hear from you! Now you can follow in so many ways!

Friday, 11 April 2014

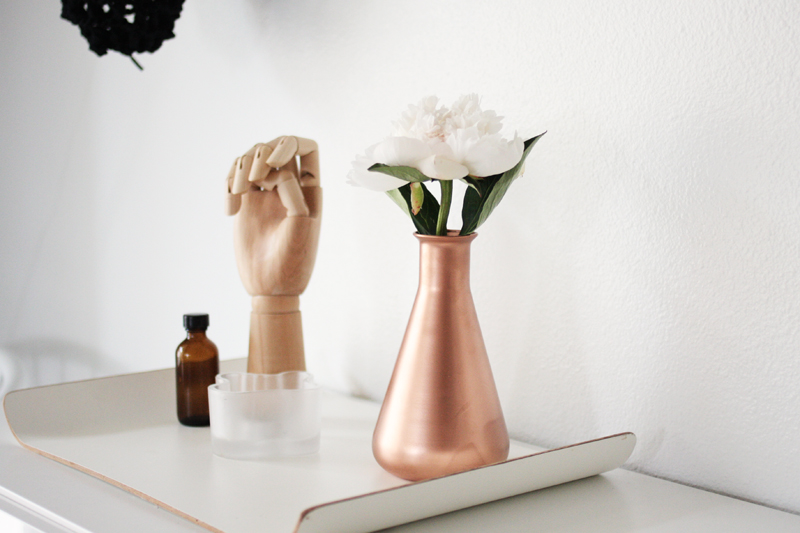
4 ways to make DIY Copper Planters or Vases / 4 Vasi in Ramo per i Cactus FaiDaTe

From copper caps @ poppytalk

from cardboard @ curbly

using copper leaf @ stylemyhomewiththingsofmyown
using spraypaint @ amerrymishap
I've been loving the look of minty green plants in copper containers.  Here are 2 DIYs to try for making your own. I think I might make a few to add some warmth to the kitchen of the new house.

-

Sto amando l'aspetto di piante verde in contenitori di rame. Qui ci sono 4 DIYs provare per fare il proprio. Penso che potrei fare un paio di aggiungere po 'di calore alla cucina della nuova casa.

 Jess

---
Liking buonaserababy?  I'd love to hear from you! Now you can follow in so many ways!

Friday, 4 April 2014

Fimo Birthday Cake for Bear - Una Torta in Fimo per il Compleanno di Orso


Sera loves pretend play and is especially fond of her Sylvanian Families babies.  In the past few weeks I've noticed that she's been celebrating the birthday of 'baby bear' over and over again... the other babies give her gifts and sing happy birthday in English and Italian. Sera would places them each carefully around the table and present them with their 'cake' which is really a small pot of vegetable soup that came with her kitchen set.

I decided to surprise her today by making a 'real' cake for Bear to celebrate with her friends.  It's strawberry flavoured, made out of fimo clay and she's so excited about it she even let the adult critters come to the most recent birthday party (normally the mommy rabbit has to wait in the car... ahhahahaha).

Here's a quick how to...


prepare a ball of white clay for the cream with 1cm diameter. Prepare a beige ball, pink ball and red ball at 2cm each. Make sure you knead them until they are soft.  Roll out each ball (except for the pink) until you have a sheet of clay 3mm thick. Cut out circles from the red, white and beige sheets the same size you want your cake final cake (I used the cap from a cosmetics bottle). Put aside the leftover red clay to make strawberries later.

Stack the circles in this order: Beige, red, white, beige.  Roll out the pink clay as thin as you can make it without tearing and carefully place it over your clay stack folding it down on the sides and tucking it underneath. Cut of any excess and roll the clay puck on it's side and flatten its top until it is smooth.

Now break the leftover red clay into 4 mm pieces and roll them into slightly cone shaped balls place the balls on top of the cake in a nice pattern... these will be your strawberries. With a toothpick, gently poke the strawberries all around to give them the look of being dimpled.

Finally, with a sharp knife, cut a few slices off your cake to serve to your guests.

Bake everything in an oven preheated to 150°c for 10 minutes, let cool and have fun!

Sera ama giocare ed è particolarmente appassionato dei suoi Famiglie Sylvanian. Nelle ultime settimane ho notato che continuava a celebrare il compleanno di 'Baby Bear' ... gli altri bambini danno i suoi regali e cantare buon compleanno sia in inglese che in italiano. Sera li appogia con attenzione intorno al tavolo e li presenta loro il loro 'torta', che è davvero un piccolo piatto di minestra di verdure che è venuto con il suo set da cucina.

Ho deciso di farle una sorpresa oggi facendo una torta 'reale' per Orso.

Ecco una rapida come fare ...

preparare una palla di fimo bianca per la panna con 1 centimetro di diametro . Preparare una palla beige , rosa palla e palla rossa a due centimetri ciascuno. Assicurati di impastare fino a che non sono morbidi. Stendete ogni pallina ( ad eccezione della rosa) fino ad ottenere un foglio di fimo 3mm di spessore. Tagliare cerchi da fogli rossi, bianchi e beige della stessa dimensione che si desidera la vostra torta torta finale ( io ho usato il tappo da una bottiglia di cosmetici ). Mettete da parte l'argilla rossa rimasto per fare le fragole più tardi.

Sovrapponi i cerchi in questo ordine : beige , rosso, bianco , beige. Stendete la palla rosa molto sottile, senza strappi e con attenzione. Posizionarlo sopra la torta piegando verso il basso i lati. Taglia i eccessi e rotolare il disco di fimo sul suo lato e appiattire la sua cima fino a che non è liscio.

Ora con il fimo rosso rimasto fai dei pezzi e formare delle palline leggermente cono e posizionarle sulla parte superiore della torta ... queste saranno le vostre fragole . Con uno stuzzicadenti, colpire delicatamente le fragole dappertutto per dare loro l'aspetto di essere fossette.

Infine , con un coltello affilato, tagliate alcune fette della vostra torta per servire ai vostri ospiti.

Cuocere tutto in forno preriscaldato a 150 ° C per 10 minuti , lasciate raffreddare e buon divertimento!

 Jess

---
Liking buonaserababy?  I'd love to hear from you! Now you can follow in so many ways!