Showing posts with label dollmaking. Show all posts

Thursday, 13 March 2014

Fantastic Toys - Printable fun!


The past few days I haven't been feeling great and have been a bit run down. Whether it's my APS or Sjorgrens' or Connectivity Disease I can't tell you... I only know this feeling as one thing: Fatigue.  There's no sense in looking for reasons cause I know what I need to do... rest.

But with a happy, energetic three year old in the house every afternoon that's not always easy.  It's also not entirely fair to plop her in front of the TV for four hours or force her to have a long nap cause 'Mommy is feeling tired.' Instead I try to invent activities that don't run me down and that are new and exciting to keep her entertained.

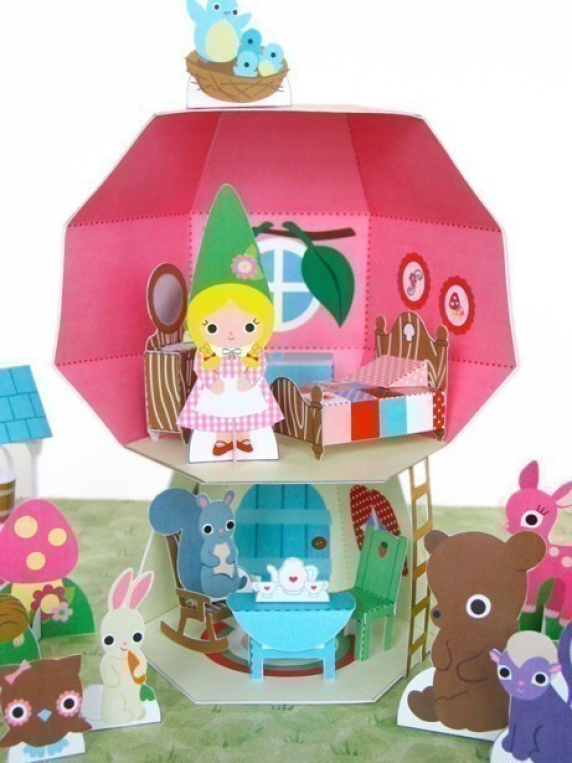
Thank goodness for creative people like Timothy Haugen at Fantastic Toys!! I bought his Mushroom Cottage Playset via his Etsy Shop today to assmble and play with Sera this afternoon. Fantastic Toys has many different playsets you can purchase for just a few Euro and they're adorably designed.  The other great thing is that you can print them over and over again because the PDF file is yours to keep!  With all the cutting and pasting we're sure to have an easy, relaxing time and I'm sure Sera will love playing with the finished product!

I've created other toys from printables online in the past. Remember these Cone Girls? Sera still plays with them!
-
Negli ultimi giorni non mi sento tanto bene. Che si tratti di APS o Sjorgrens o la malattia connettività non posso dirti ...  so solo questo sentimento come una cosa: Fatica e stanchezza. Non c'è alcun senso nel cercare ragioni perché so già quello che devo fare... riposarmi.

Ma con una felice, energica bimba di tre anni in casa ogni pomeriggio non è sempre facile. Non è neanche giusto possizionarla davanti alla TV per quattro ore o costringerla ad avere una lunga sonnellino perchè ' la mamma si sente stanca.'  Cerco invece di inventare attività  dove non devo muovermi troppo e che sono nuovo ed eccitante per mantenere il suo attenzioni .

Grazie a Dio per le persone creative come Timothy Haugen a Fantastic Toys! Ho comprato il suo Mushroom Cottage Playset via il suo Etsy shop oggi. Fantastic Toys ha molte playset che si possono acquistare per pochi euro e stanno adorabilmente progettato. L'altra cosa bella è che è possibile stampare più e più volte perché il file PDF è il vostro da mantenere! Con tutto il taglia e incolla siamo sicuri di avere un pomeriggio divertente e rilassante e sono sicuro Sera amerà giocare con il prodotto finito!

Ho creato altri giocattoli dai PDF nel passato. Ricordate questi Cone Girls? Sera li gioca ancora!

 Jess

---
Liking buonaserababy?  I'd love to hear from you! Now you can follow in so many ways!


Monday, 6 January 2014

Baby Bloomers to Barbie Clothes


Doesn't Midge look awsome? Black gingham really, really, suits her. Here she is with a versitile little item that can act as a headband and top, bubble skirt or even a sweet, warm weather mini dress. Wow!

Would you believe that I knocked this outfit out in 1/2 hour, and that you can too? All it takes is some basic sewing machine skills and an old pair of baby bloomers.  Sera doesn't fit into them anymore so why not recycle right?

Scroll down to below the images to get the full tutorial.


Step 1: Cut up the bloomers at the seams. There should be two on the hips and one underneath.  You should now have two underwear shaped pieces of material.

Step 2: Cut along the elastics at the waist and leg bands and keep these aside. You'll have two thick waist elastics, 2 skinny front leg elastics and 2 skinny back legs elastics.

Step 3: Take the front part of the bloomers (the smaller one) and cut out a 4"x8" (or roughly 10cm x 20cm) rectangle (top photo). I make sure to iron things flat before cutting them and use a rotary cutter, ruler and mat for my straight cuts but you can also use a fabrics scissors (second photo).

Step 4: Take one of the (only slightly) longer  of the skinny elastics and pin it along the long edge of the rectangle you just cut with the finished edge facing down and right sides together.  Make sure to stretch the elastic as you go.

Step 5: Pass the long edge through your sewing machine, making sure to stretch the elastic out as you go.

Step 6: Repeat for the other long edge. You should have something like what Midge is holding in photo number 3.

Step 7:  Put the garment loosely around your Barbie's torso and pin the back side to get an idea of the finished size.   I put it on the right way, pinned, removed it (make sure you can get it over her hips) and then pinned the right sides together in the same place as with the wrong sides together.

Step 8: Sew the back seam with right sides together and trim excess.

The little headband is simply one of the leg elastics sewn into a loop. It's a great little accessory and doubles as a belt when Midge wants to wear the garment in the mini dress version!


Voilà!

Make sure to leave me a comment if you like this tutorial and want to see more! I feel super creative this week and am planning on taking requests!

Jess


---
Liking buonaserababy?  I'd love to hear from you! Now you can follow in so many ways!

Sunday, 5 January 2014

Summing up Sunday: 2014 - Week 1

This week has been a whirlwind and has gone by in a quick blur.

New years was a last minute thing on our part because initially we were supposed to have a few friends here, but one thing led to another and no one could come! :-(  Instead we went to our friends' Linda and Claudio's house to celebrate with their friends and family as well as to meet their new baby son Giorgio. He is sooooo super cute!

I dedicated the first few days of the year to caching up on Sera's memory quilt and even started sewing some pieces together.  It's really much more satisfying than just cutting up all that baby clothes is.

I've also been on an organising/purging/cleaning kick and managed to tackle the compactum where we keep all our outerwear, our laundry 'room' (it's really a closet in the kitchen/den), my 'home office' (the closet upstairs) and Sera's toy kitchen.  Feels good to accomplish things.

YesterdayI made some doll clothes for Sera's Barbies (tutorial to come!) and then we went to Piacenza for lunch with Mauro and Carlotta.  Really a lot of good fun and good food!

A few photos from the week:

  • sparkly glitter New-Year's nails
  • first brekkie of the year: pomegranate, banana & clementines
  • Sera learnt to draw 'Humpty Dumpties'
  • lots of work on a memory quilt
  • all dressed up for New-Year's party
  • our newest friend Giorgio
  • Sera slumber party
  • playdate @ IKEA with Lele
  • baby bloomers to Barbie clothes (tutorial post coming up this week!)

---
Liking buonaserababy?  I'd love to hear from you! Now you can follow in so many ways!

Friday, 15 November 2013

More Crafting Fun - Fabric Scrap Paper Dolls

Everyone knows I love paper dolls and fabric scraps but I never thought to put them together for a fun indoor activity for Sera. 

If you liked my post about Mr. Printables Cone Girl Paper Dolls then you'll love these ideas by Carrie at This Mamma Makes Stuff and Sarah at The Small Ornament.  They've offered free printables of basic cute dolls that you can print out at home and dress up in any way with just bits of scraps and glue!

I haven't actually gone ahead and printed out the template as I found it just quicker to sketch up a few doll bodies of my own on card stock and get to it.

All you need to set up your own activity is some card stock or heavy paper, a glue stick and cloth scraps of any sort.  Ribbons, beads and glitter, though more fiddly are great additions to the fun too!

This is a PERFECT project to keep Sera busy with while I continue to cut blocks for Sera's baby clothes memory quilt which has been sitting on the back burner for the last little while. Every time I get a new scrap Sera ends up with a new belt, headband, skirt or bow.... It's win-win!

We did this activity yesterday afternoon and it kept her busy and quiet for over two hours!  At a certain point she realised that she could take the 'clothes' off and start again once it dried and she had lots of fun 'trying on' different outfits.  She even made me call daddy to tell him we were playing the dressing up game. In the end I actually had to physically drag her away for bath time!
Some of my favorite completed dolls


Wednesday, 30 October 2013

A Little bit of Autumn

As October is nearly coming to an end I thought I'd fill you in on our Autumn so far:

-This year I decided not to carve any pumpkins and instead to draw directly onto the pumpkins wth Sharpie markers. It's a quick solution and though I can't put candles in them they will last a little bit longer this year.  I can't wait until Halloween... Sera wants to be the tooth fairy!

-There are still flowers blooming in our tiny urban garden outside. Until last week I couldn't remember what colour these flowers would be but then as soon as they bloomed I remembered. Pumpkin orange! Perfect for the season.

-Sera and I have found a beautiful park behind her new school. Every morning we arrive a little early and park on the other side of the park so that we can walk through it and listen to the birds. After I pick her up, we do the same ont he way back to the car but this time can stop to walk across a log, collect leaves or pick the last wildflowers of the season.

-I pulled out my old Halloween decorations this week and found this old friend in the box. He's a papier machè cat I made for myself quite a few years back after reading an article about Lori Mitchell's version.  It's clear I didn't stray at all from her design so all the credit goes to her. Check out her other characters!

Thursday, 24 October 2013

Cone Girl Cuteness!


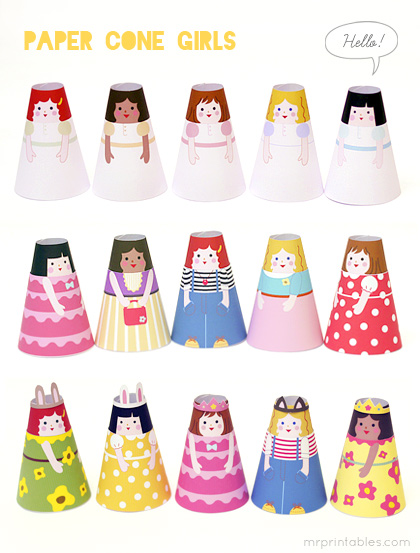
I'm in love-love-love with these free printable cone-girl dolls that I found over at Mr.Printables.  Not only are they adorable but they're much more manageable for Sera's little hands than traditional paper dolls with tabs and they're 3D! What could be more fun?

Since I've printed them out Sera is OBSESSED with these. She does crumple them up every now and then out of sheer excitement, but then she brings them over to me and in a sweet voice says 'Mommy, I crumples her.. can you fix it?' and of course I do. She wanted to take them with her for a nap and we did have a few tears because I told her she couldn't and they would get ruined.  As soon as she woke up she asked me were they were. She says they're her favourite! For the cost of the ink and a few pieces of paper I think that it's quite a bargain to have a new favourite toy! I was also thinking that by simply laminating the cut-outs before assembling them you'd also have something that lasts a bit longer -less damage can be done during inadvertant crumples. I suppose that'll have to be for the next batch.  If you act quickly you can also print out the adorable halloween costumes for the girls in time for the festivities next week.


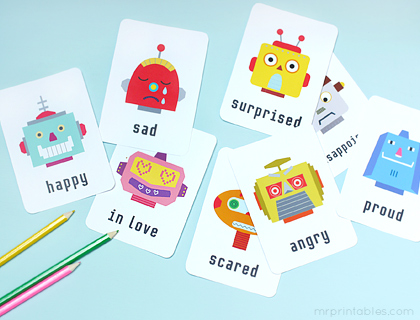
The Mr. Printables site is amazing because they also provide wonderful free printable paper toys, decorations, crafts and learning tools with beautiful graphic design.  Head on over to the site for access to all the printables or to the connecting blog where you can see loads of wonderful projects they're up to.  I love these robot emotions flashcards.  I find it adorable that robots, who normally don't express emotions are being used to teach kids about feelings. Clever and cute. Hooray for Mr. Printables!


Friday, 30 August 2013

THEWONDERFUL: Mimi Kirchner

This is the first in a series of posts about artists and people that I admire that I've found during my long rambling strolls through the world wide web.  Please be on the lookout for other THEWONDERFUL posts.


one in a series of amazing fox dolls
I'd like to introduce you to THEWONDERFUL Mimi Kirchner, art-doll maker, collector of scraps and creative inspiration.

I can't remember when I first stumbled on one of Mimi Kirchner's creations. It could have been when I was doing research for either Mimmi (Sera's Waldorf style doll.  Not the same Mimi of this post, but maybe that's where I subconsciously stole the name) or Princess Penelope, but in any case I began to follow her blog immediately and haven't been able to get enough since.  I'm thrilled that she's allowed me to share some images and info about her and her work with you.
An image of Mimi from her about page.... look at those handsome strongmen!

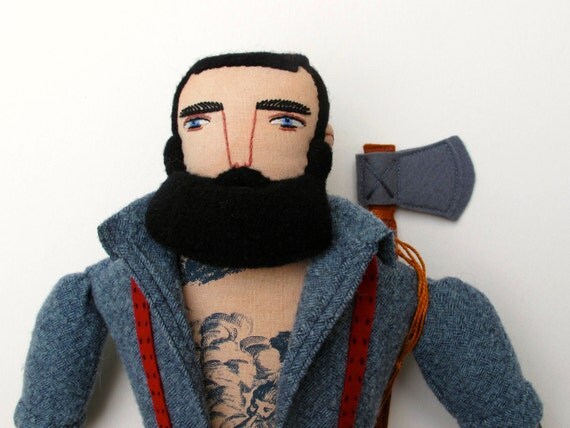
Mimi's work is super stylised and anything but your ordinary collection of dolls. She is focused on out of the ordinary subjects for her dolls such as tattooed strongmen, fish, foxes and more. You can see (and purchase! Hooray!) a selection of her recent creations in her Etsy shop online.  A tattooed lumberjack would make a wonderful, and unexpected gift for any rugged art-doll collector.

tattooes lumberjack available for purchase via etsy.

pattern available for free!
The thing I love about her work the most is how her sense of humour and individuality comes through in her characters. Each and every work I've had the pleasure of seeing from her is unique and full of whimsy and joy. Through her work you can really see that she has committed herself to fulfilling her unique and very special role in this world. She's truly an inspiration and I also hope to find whatever it is that I am uniquely gifted at one day.

If you're interested in experimenting with your own creativity through Mimi's unique style of doll making you can follow a full tutorial for free here on Purlbee with a printable pattern!  Thank you so much Mimi for generously allowing us to have a little bit of your magic at our fingertips as well!  If I ever get around to getting back to doll making this tutorial is first on my to-do list!


Tuesday, 30 July 2013

Shrinky-dink dollies

As you may know I've been playing around a lot lately with shrinking plastic. I've already used old yoghurt containers to make jewellery parts and used shrinking plastic (bought at a crafts shop) to make wine glass tags to keep my guests from confusing their glasses at parties. It's becoming a bit of an obsession of mine to sit down in front of the oven and watch the magic take place!

My latest shrinking adventure combines another of my huge life's obsessions; paper dolls.  I've been an avid collector of them since before I can remember. Back in Canada I have thousands of uncut paper doll books in storage (as soon as I get a larger house over here I'll finally have them shipped) and a nice growing European collection as well.

the dolls drawn out in pencil
To avoid cutting up my precious books but to be able to share my love of them with Sera I have been photocopying some of the rarer versions and cutting them up to play with but when I got the shrinking bug I had a new idea - shrinky-dink paper dolls!

Doing some research I found out that I'm not the first person to have thought of this... Check out this post by another momma shrinking up some dolls for her daughter.

I drew out the dolls and clothes by tracing in pencil a paper doll we had just gotten as a gift (thanks mum!) and altering the design to look more like a grown up version of Sera. Then I let Sera colour the clothes any way she liked with Sharpies (permanent markers... Watch out for clothes and furniture!!). We did four outfits and shoes.  I carefully coloured in the doll asking Sera what colours she would like for the various elements and polished up her finished clothes with details like bows and polka dots where needed.
concentrating on making things pink

After cutting out all the pieces we shrunk them in the oven as usual... Low heat for three minutes or until flattened out. Then left them on the counter to cool. Unfortunately, the shoes came out way too tiny to use (pinky fingernail tiny) but the clothes were adorable, colourful and fun!

into the oven as usual
Instead of using velcro strips as in the tutorial mentioned above or another obvious choice, magnets, I decided to borrow an idea from my shrinky wine tags and use patafix/bluetack for attaching the clothes to the doll.  It worked out perfectly because it meant that the was nothing permanently marking the doll. The results were wonderful and Sera was very proud that she designed the clothes.

The only down side of the project was that the patafix is tiny and tempting for little mouths.... This is not a toy to leave with your child unsupervised if they're on the younger side of the scale. Both because of the patafix and the clothes, which are small enough to be dangerous if ingested!

I'd say that the perfect age to try this activity is around five or six years old. That way the child can do a little more work on the clothes and doll and you can make two or more dolls at a time.  Another alternative would be to not have the dolls dress up at all and instead to create characters for a play scene that you put together with your child. Maybe the technique could even be used for homework projects and dioramas!?
teeny tiny shrunken dollies!

I'm sure we'll find another project for shrinking plastic quite soon!

Sunday, 28 April 2013

Princess Penelope

The newest member of our cloth doll collection came to life because my osteopath cancelled one day and I wandered into a crafting shop to use the hour I suddenly had on my hands. There I found a bag full of premade doll parts made from felt and wool and I was inspired. I got it into my head that I could buy the doll parts, make up dolls like the ones I love to look at on Pinterest and start up my very own etsy shop to sell them in. It would be my new career!

Hahahaha... The part of me that gets carried away was long gone already as I found myself, days later knee-high in fraying pink tulle and failed attempts at regal looking princess dresses. Another crafting disaster.

But Penelope was saved! Help was on its way in the form of a dress-making fairy grandmother! Luckily some weeks later my mother-in-law came to visit and finished up my disaster of a dress attempt and created from shards and scraps the dress you see here. The secret was creating a dress that wasn't removable. I think I'll keep that in mind for the future, after-all she's not a fashion doll.

I finished the face detail and styled the hair and now Sera has her very own OOAK princess. The only thing left to do is create her regal crown.

Needless to say there won't be an Etsy shop anytime soon.

Say hello to Princess Penelope, a wonderful testimony to collaboration in artistic endeavours.

Thursday, 11 April 2013

I made a "Waldorf" doll

It's a year now since Mimmi's become part of our family. I almost feel guilty about not organising a birthday party for her... But you know how it is with second children. They don't get nearly as much attention as the first does and they're lucky if they even get a baby album or if anyone notices when they take their first steps.

Happily we don't have to worry about recording milestones with Mimmi.

The idea to make a Waldorf style doll came to mind some months earlier, in the dark, cold evenings of winter 2012. Sera and I were frequenting at the time 'tempo per la famiglia' a group for new mums and preschool tots to get together and play organised by the Comune do Milano, and one of the lovely teachers there was passionate about Waldorf dolls. Naturally, Fulvia eventually discovered that I like making children's toys and that I was quite good at sewing so she lent me some books from the 80's with illustrations and how-to's.

I'm a modern girl so the black and white books piqued my interest but just wouldn't do. I went online for more info and research, half thinking I couldn't be bothered to find the supplies. But then I came upon a post on Pinterest about a wonderfully talented doll-artist named Juliane Strittmatter (check out her blog here) who was offering online e-courses and that she would send you everything you need in a cute little packet and en teach you how to make the doll from scratch and by hand... No machine necessary. I was sold.

It took 8 weeks to bring Mimmi to life. I got blisters on my fingers while stuffing her and making her nose and strained my eyes completely while tying to embroider hers, but the hardest part was her hair. Initially Sera found the doll as I was working on her so I crocheted a hat for her until the hair would be done.

The hat went down well as Sera liked to put it on and pull it off again and I slaved away on this really intricate crocheted wig for Mimmi t have on her head.  And I've never crocheted before.

Months passed and finally the wig was complete and I proudly squeezed (should have been slid, but probably didn't follow the instructions properly) it onto the doll's head! Hooray for Mommy! Nope. Sera promptly began to cry... full tears, face squished up in a knot and wailing at the top of her lungs.

I was about to cry as well!!  I'd spent so long on that wig! For 2 whole days I fought with Sera over it (well, if you can call it 'fighting'.  Toddlers are really tough to fight with) hoping that she'd cave in and see things 'my way' and learn to love the horrendous carrot red wig I'd spent so long in making. She didn't.. tears tears tears... and then I realised that it was one of those things where my own selfishness was preventing me from being a good parent and so I gave in and put the wig away.  

Mimmi was bald for months. 

Lanar, Via Nino Bixio 7 - 20129 Milano
And then I found a cute tutorial online about yarn hair and simply looping it and sewing it on to make a style. So I went on an adventure to this fantastic yarn shop in Milan Lanar and fund a wonderful blend wool with some natural straw fibers in it as well... In Sera's haircolor.  It was perfect.

I got home and started right away on the new hair which only took about a week of sitting in front of my favourite TV shows in the evenings while doing and -Voilà!!- Mimmi as we know and love her today was born!